
Reducing attack surface with Application Control and managed installer(s) - Part 2
This post will pick up where we left off in Part1.
Intro
In Part 1 we covered the theory of how Managed Installers in Windows Defender Application work. We closed off that post by running a script that prepares the Microsoft Applocker portion of the setup. The script I shared is a slightly modified version of the script MemCM uses to implement its WDAC policy. MemCM runs 4 PowerShell scripts when you deploy a WDAC policy. These perform the following actions:
- Set up the Applocker requirements that WDAC needs for Managed Installer functionality (Enable the services, define the XML for the Managed Installer Policy, merge the policy with a pre-existing policy if available)
- Create an interim CCMFiles.XML to make the SCCM Client trusted later on files in scope are (ccmsetup files, ccm files, VCRedist files, the Microsoft Policy Platform, Windows Firewall config proficed, Managed Defender and some others)
- Use The CCMFiles.XML and create a WDAC Policy with mainly hash rules for these files
- Merge the different XML files into one big policy, add the Managed Installer rule option, convert it to a binary policy and apply it.
I’ll probably do a more advanced side step going over each of the scripts in the not too distant future. If you don’t want to wait for that, do what I did about 2 years ago and apply PowerShell transcript logging on a system before you start deploying a WDAC policy.
Getting Started in Audit mode
Getting started in audit mode is pretty simple. The Wdac policies can be found in the Assets & Compliance WunderBar section. Just navigate to Endpoint protection \ Windows Defender Application Control and create a policy. There’s a fairly limited set of configuration options.
- Enforce a restart: If you leave this blank the policy can’t be applied to open processes. From a security perspective enabling this is a good idea. From a User Experience perspective this will most likely kill your project before you’re out of the gate. I typically uncheck this.
- Enforced or Audit Only: I believe this one is fairly self-explanatory, you should start with Audit mode first.
- On the Inclusions tab you can add support for the Intelligent Security graph, a Microsoft maintained list of trustworthy software. It’s somewhat of a black box and I prefer to be in control over what is trusted to run on my devices. -Trusted files or folders: This was MemCM’s attempt to have Path rules prior to Wdac starting to support Path rules in 1903. Afaic, this part of the UI is deprecated. This would genereate a codeintegrity_*.xml file for the scripts to pick up and generate hash rules for.
Easy enough, right. Now deploy this policy out to a device and start analyzing.
Seeing the Managed Installer in action
As mentioned in part 1, and one of the nice things of starting of a WDAC project in a managed environment, is that everything deployed through your management tool (That doesn’t break the process chain when installing) becomes automagically trusted thanks to the NTFS extended attributes.
In other words, the next step is for you to deploy something to a device that has an audit WDAC policy applied. Once you’ve deployed a package or an application, try launching it. Subsequently navigate to the event viewer Applications and services logs \ Microsoft \Windows \ CodeIntegrity. Since the app is trusted you shouldn’t see any entries there. If you would like to see managed installer entries during your initial implementation you can. Just enable logging of MI Events as detailed here
The only thing you would need to do is run the command below:
1
reg add hklm\system\currentcontrolset\control\ci -v TestFlags -t REG_DWORD -d 0x300
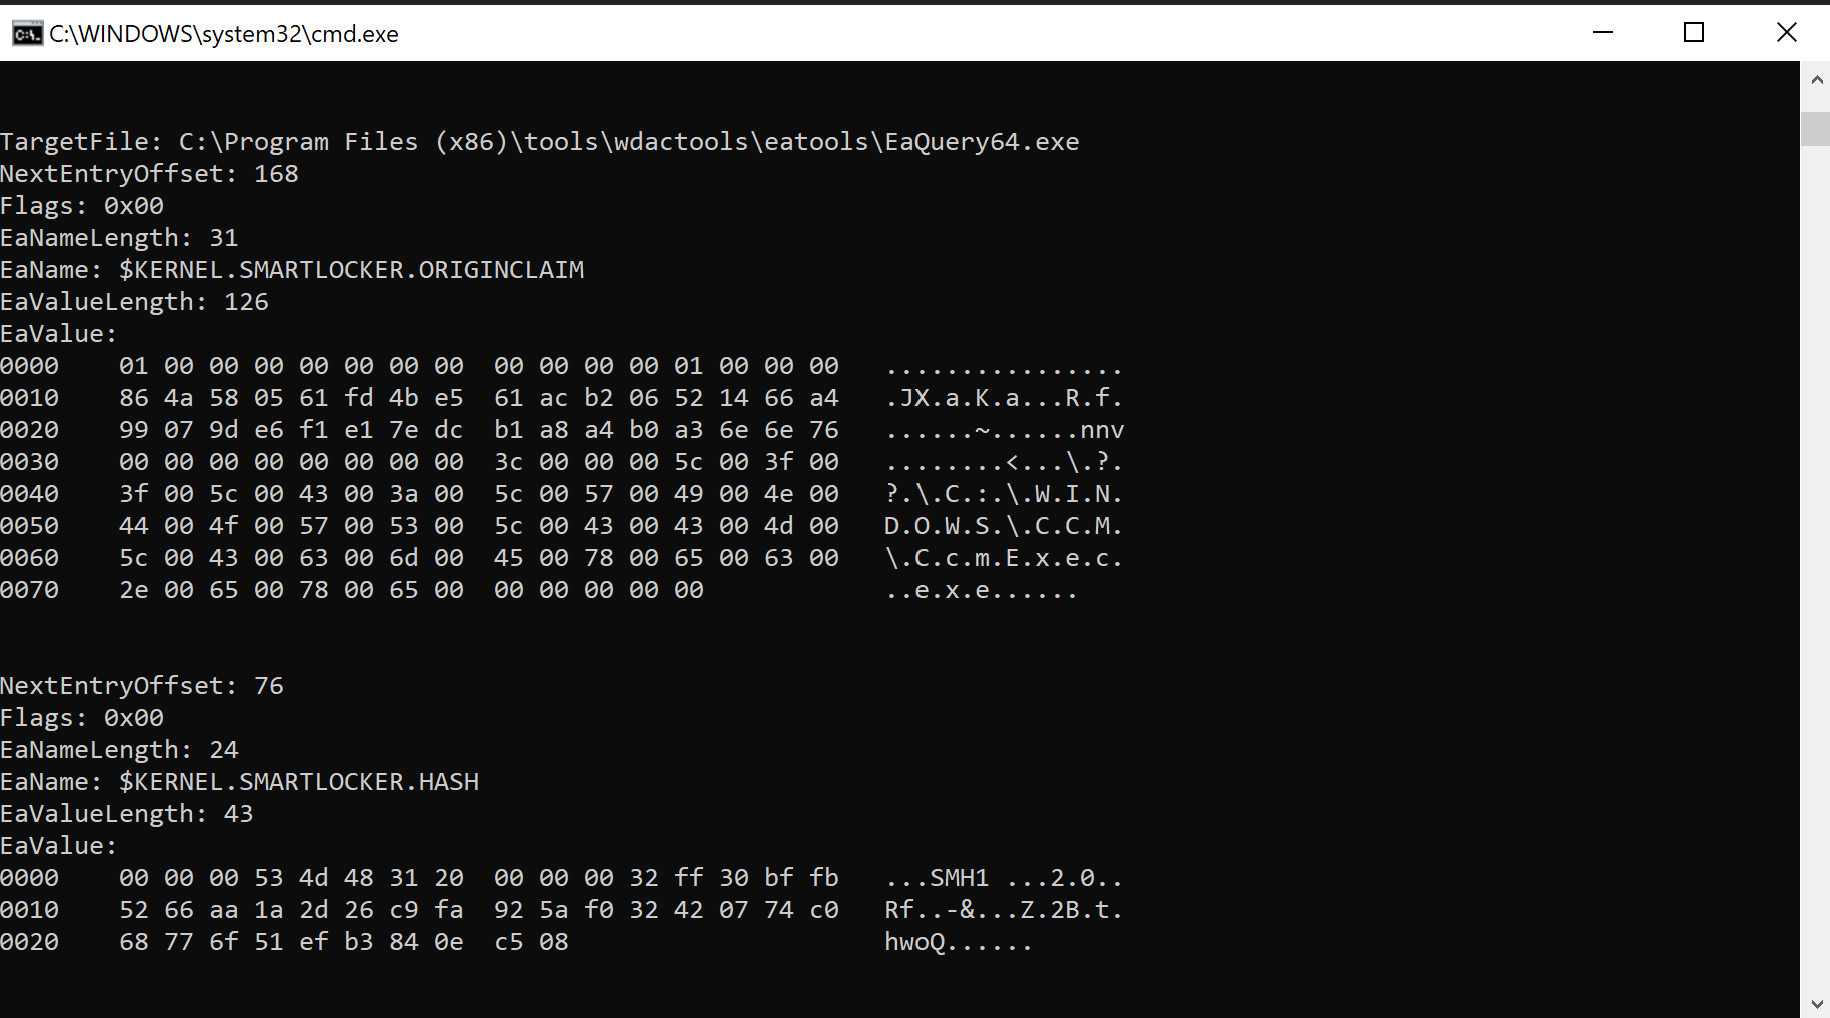
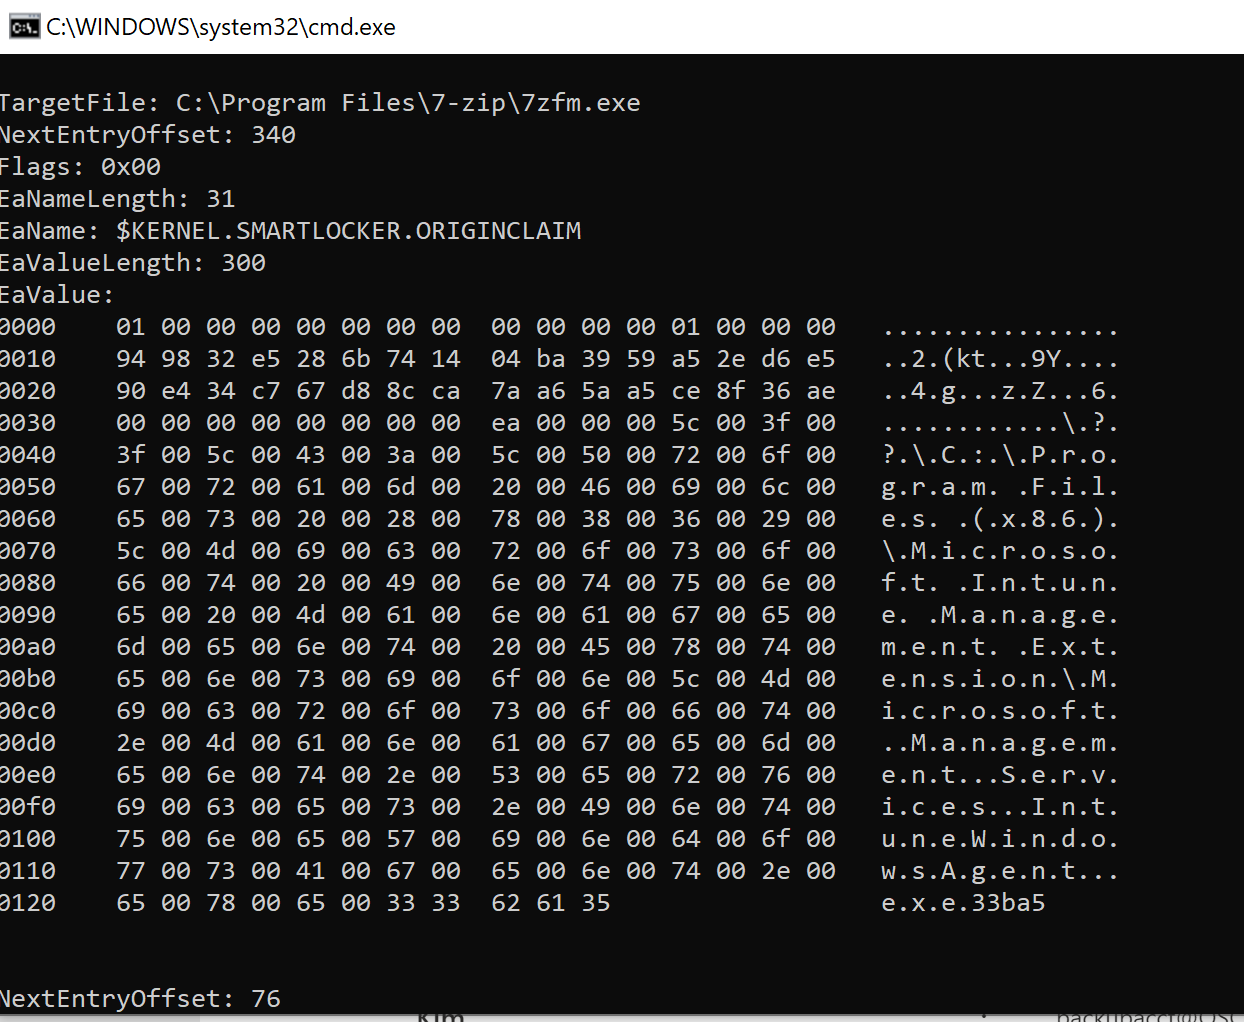
The interesting part of seeing this in action though is to have a look at the extended attributes. I’ve come to rely on a tool called EaTools and specifically EaQuery from Joakim Schicht. I owe the author a beer or two :), if this is you, consider this my IOU.
Once, you’ve downloaded and extracted the EATools zip, open a command or powershell prompt. Navigate to the folder holding the EAquery.exe executable and run the following command:
1
.\EaQuery.exe /target:"C:\Program Files (x86)\tools\wdactools\eatools" /mode:0 /verbose:2 /recurse:1 /identifier:$kernel.smartlocker
This should show you something like this, listing the process that wrote the file to disk.
Conclusion
When a process, that was written to disk by a Managed Installer launches, the Extended attribute for Smartlocker.OriginClaim is verified against your list of Managed Installers and if Managed Installers are enabled in your WDAC policy the process will just run.
If you enabled Managed Installer logging you should see an eevent with Event ID 3090, and the following on the details tab.
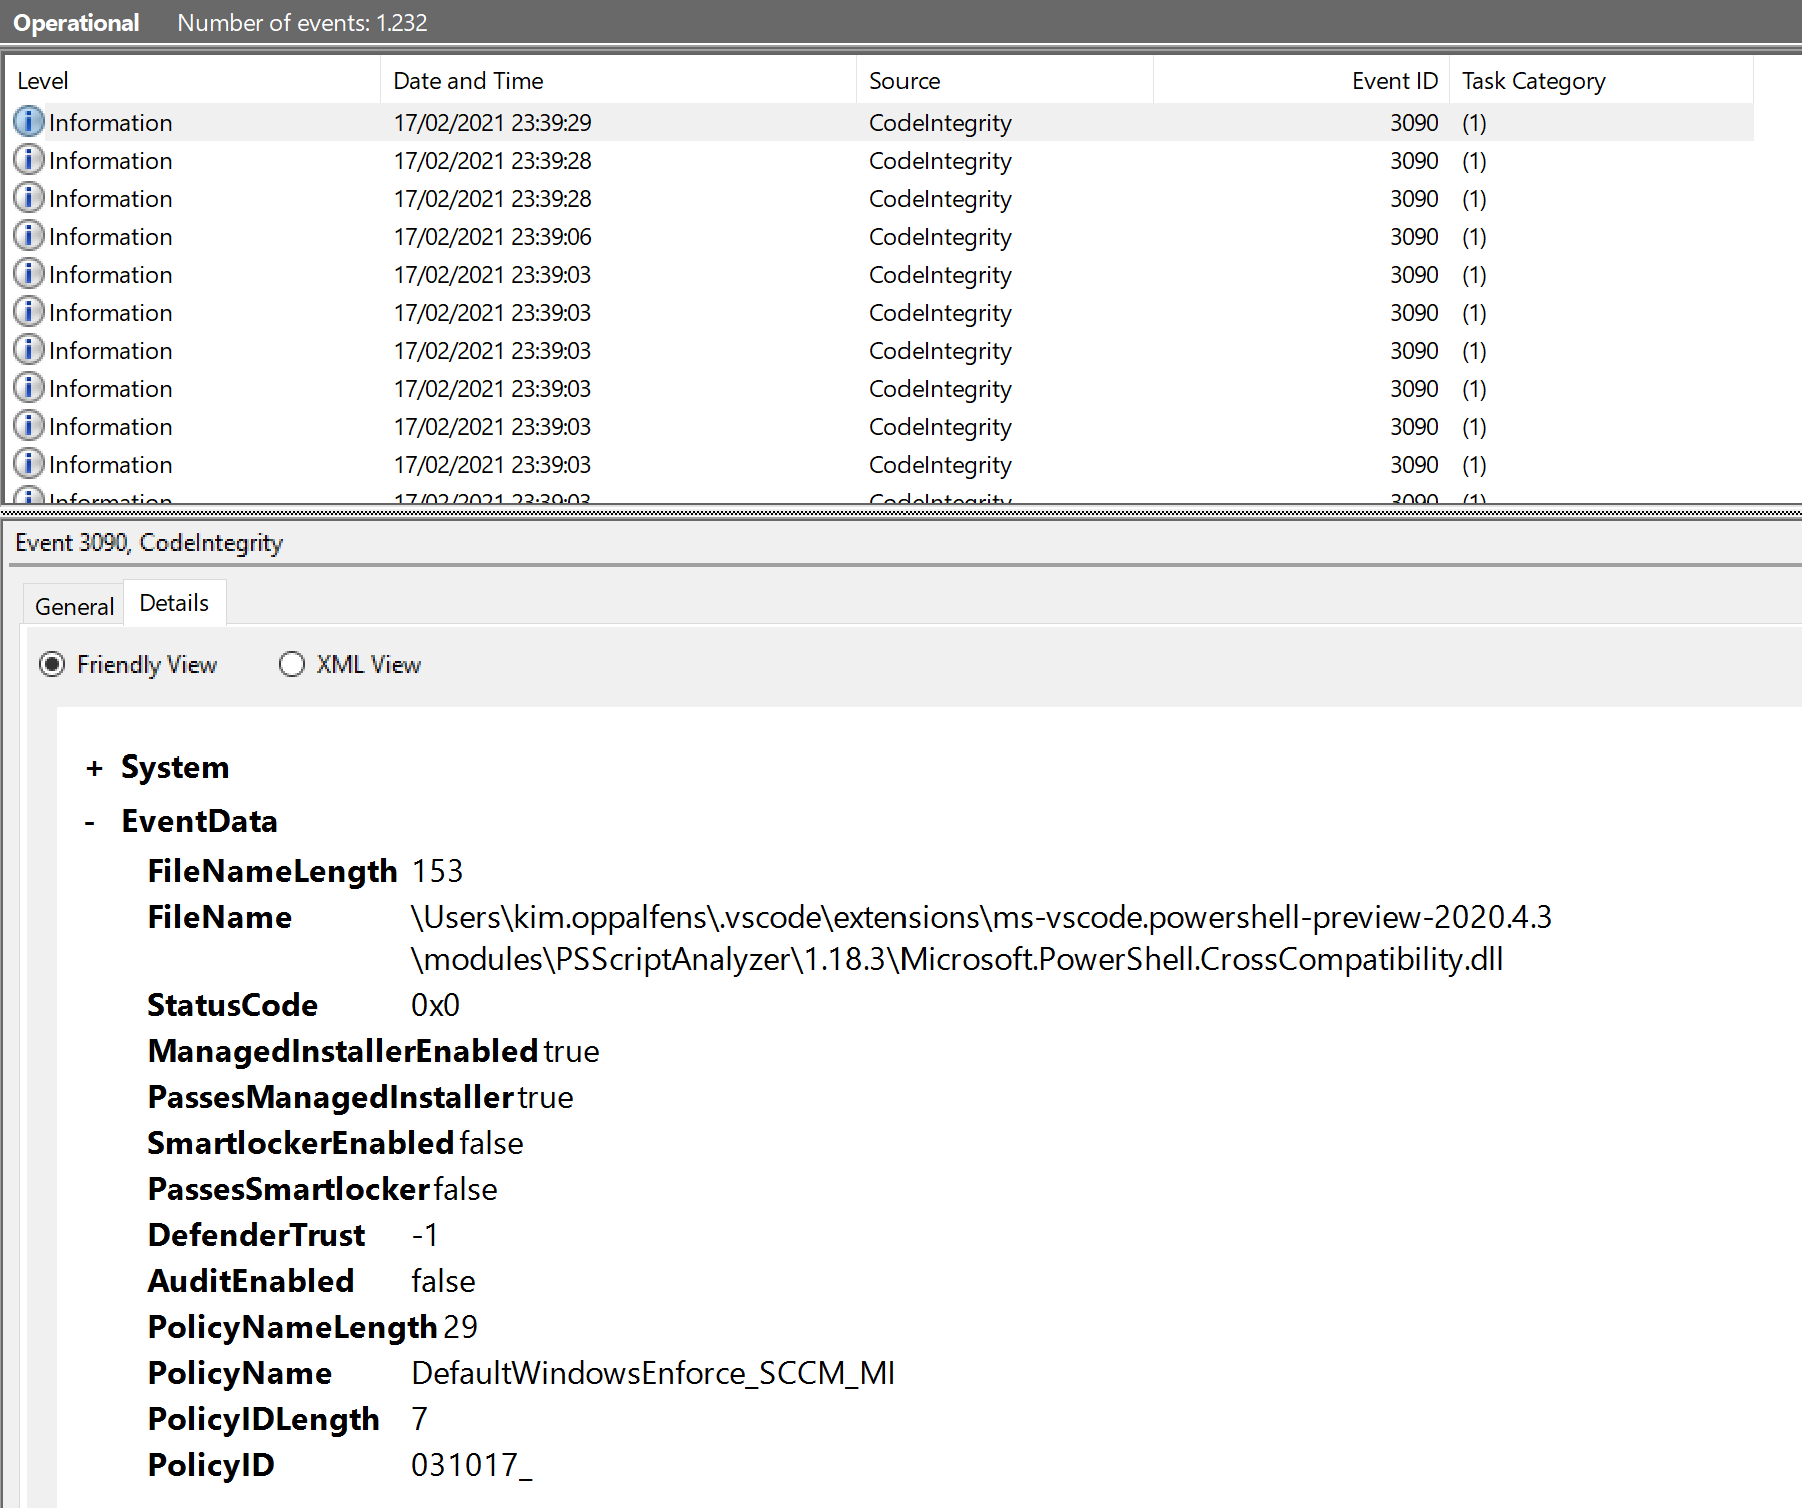
Note the ManagedInstalledEnabled true and PassesManagedInstaller entries.
Teaser bonus


Leave a Comment