
An interesting use-case for Intune and SCCM Co-Management - Part 4
Real-World scenario on where Intune and SCCM Co-management could come in handy. Deploying the Configmgr Agent through Intune.
Intro
Part 1 - Cloud management Gateway
Part 2 - AAD Discovery
Part 3 - Co management
So, in the previous blogposts we always started off with a machine that already had a ConfigMgr agent on it and enrolled it that way into Intune. Now we are going to reverse that process.
I’ve prepared a windows 10 - 1709 machine that is just domain joined and has no ConfigMgr Client on it. After the domain join, I manually enrolled it into Intune. (We are planning on a blogpost where domain joining isn’t necessary, but that has some other requirements that we’ll explain in more detail at that time.)
Once that part is done, an Intune app (containing the bootstrapper for the ConfigMgr client) will be deployed to our machine and once the ConfigMgr client is properly installed, our device should register in Configmgr and be in a co-managed state.
Creating the Configmgr agent installation in Intune
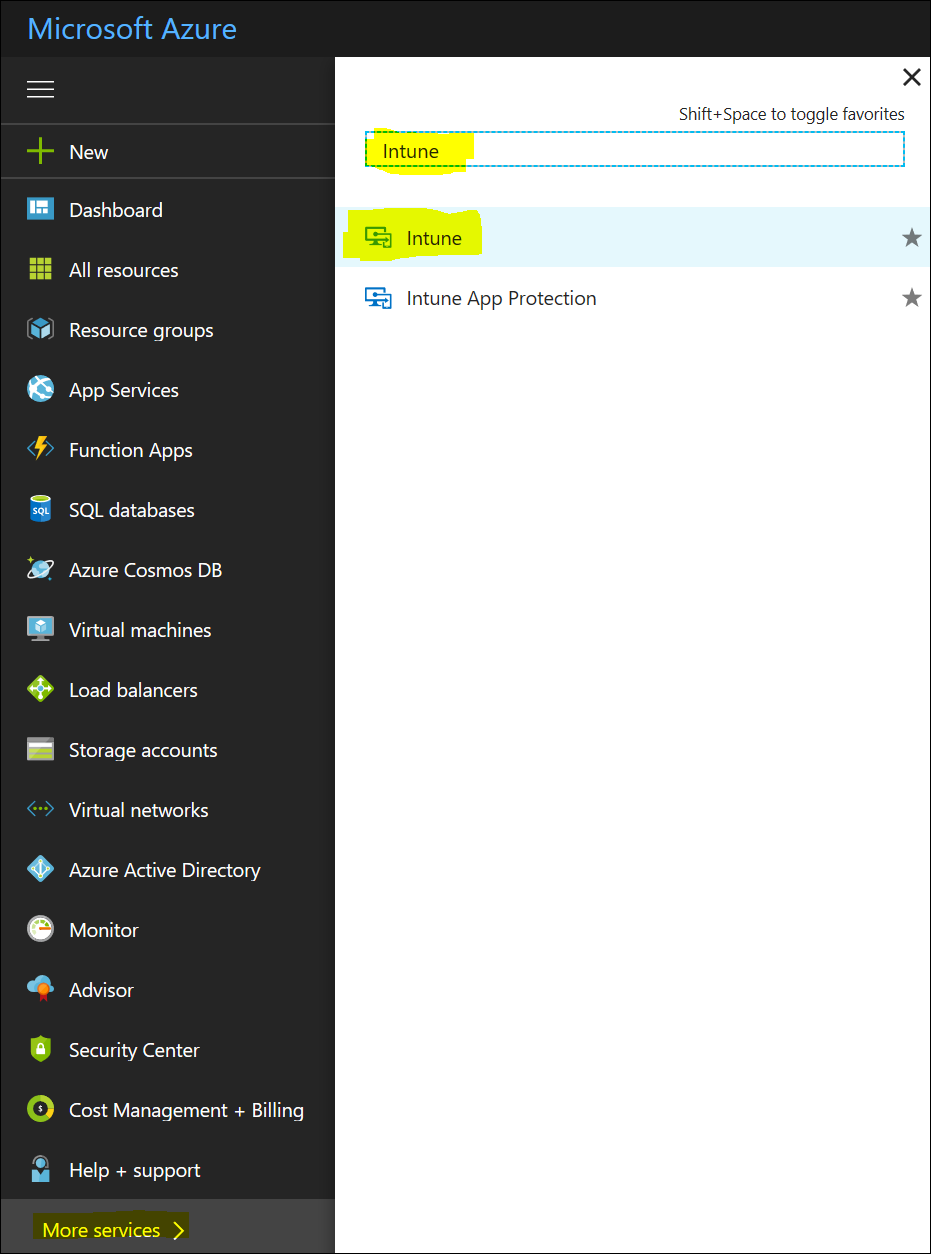
1) Logon to Http://Portal.Azure.Com with your admin account and in the Portal select “More Services” and search for Intune and select it.
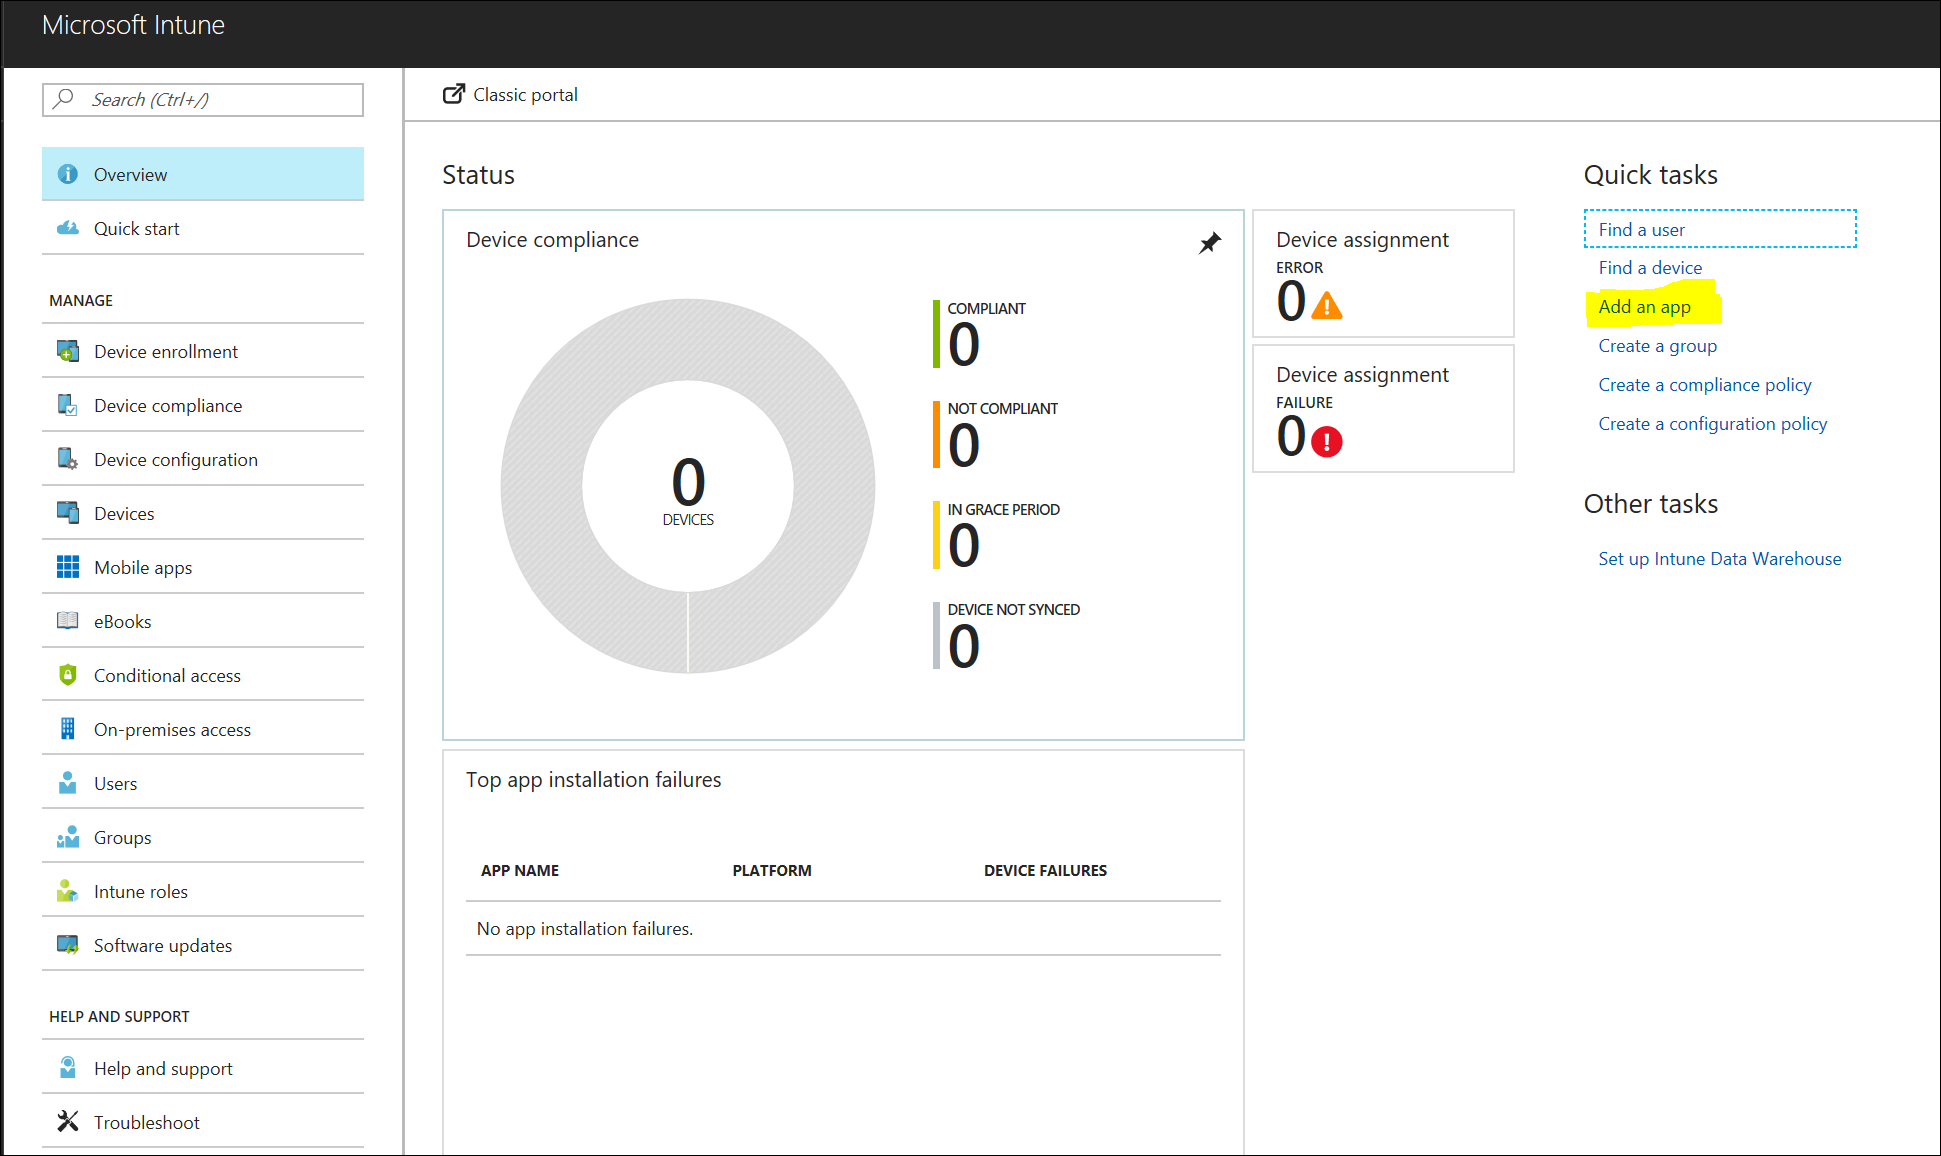
2) Select “Add an App” from the Quick Tasks.
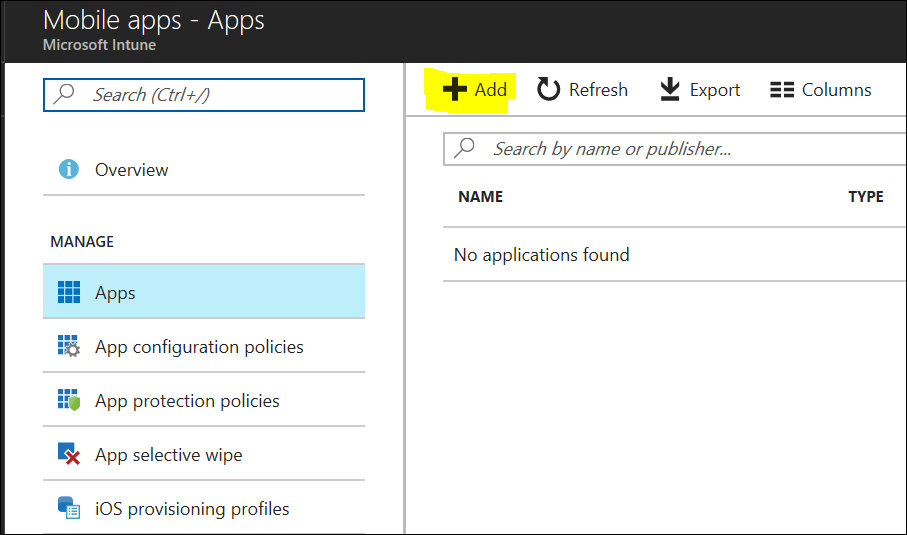
3) In the new window, select “Add” from the top menu bar
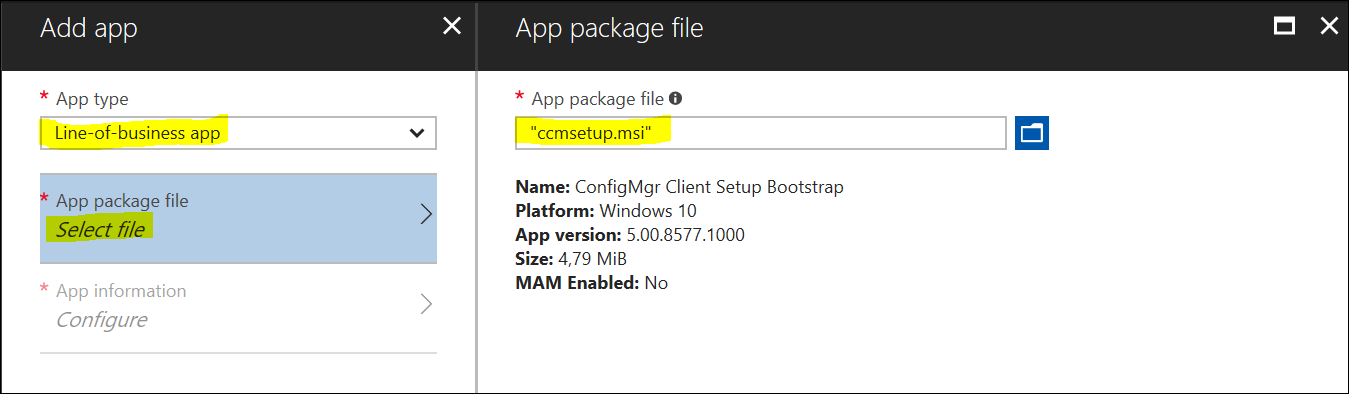
4) Select “Line-of-Business App” as the app type and click on Select File. In the new pane browse for “CCMSETUP.MSI”. Click OK at the bottom of the window to confirm your selection.
note : The CCMSETUP.MSI file can be found in your ConfigMgr installation folder in the subfolder “\Bin\I386”
5) To fill in additional App information, click “Configure”
Set Description and publisher to your liking, “Computer Management” seems a pretty good match for a category.
The key part here is the “Command-line Arguments”. Copy the command line field you were provided earlier when configuring Co-Management in this field.
Click OK to confirm the details added to the App.
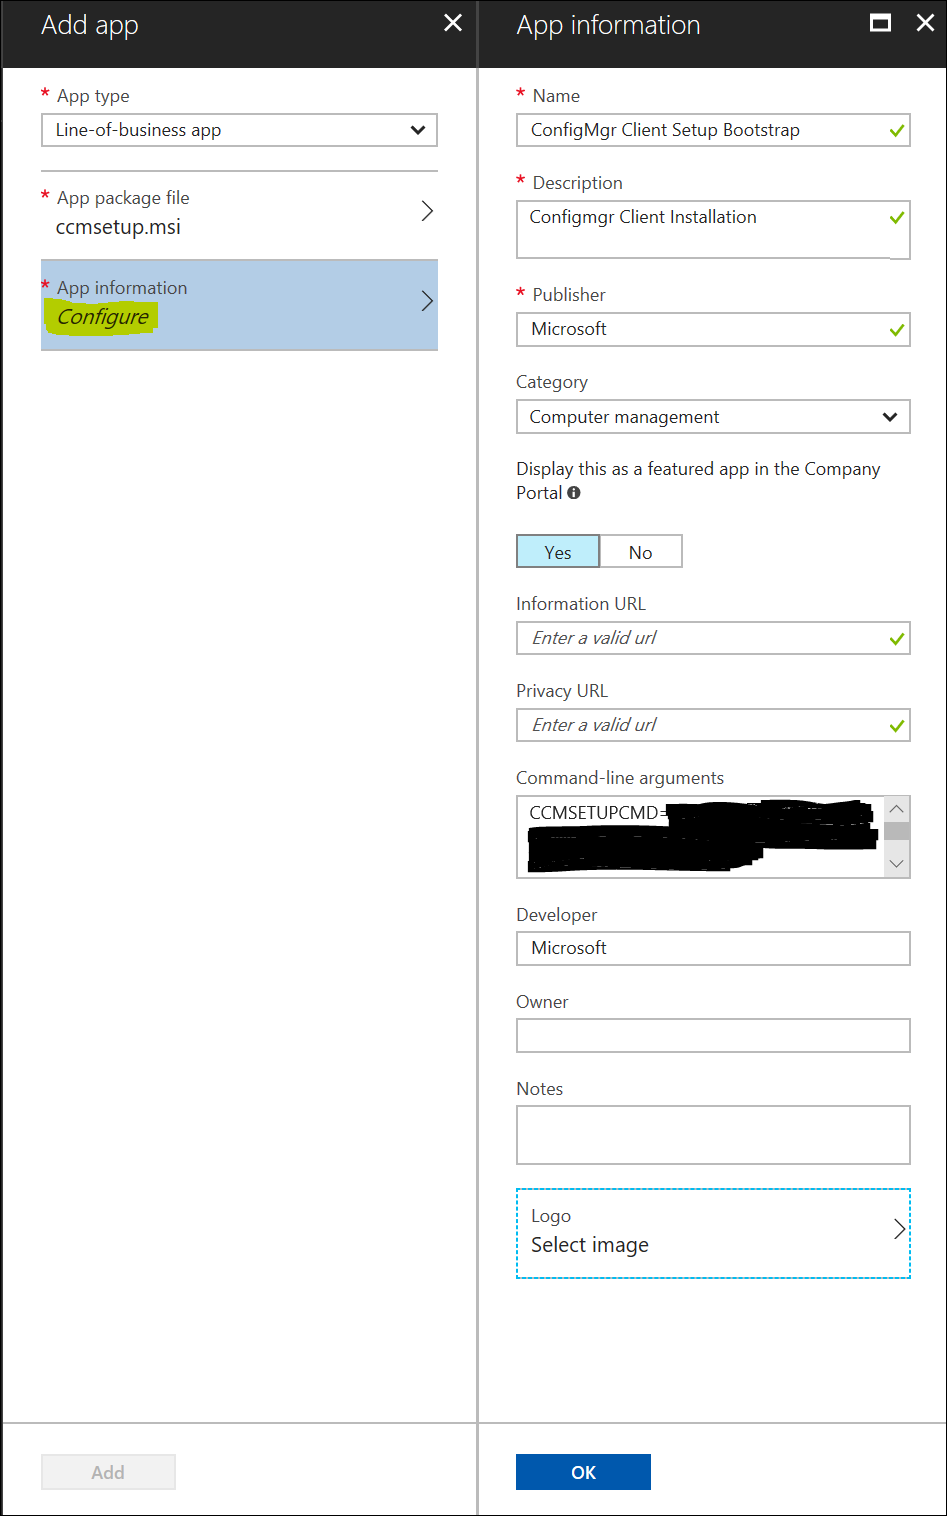
6) Finally click “Add” to Save and configure the App in Intune.
Now that the app has ben created, we can deploy it to our users.
7) Click the “Assignments” Button and then “Select Groups”
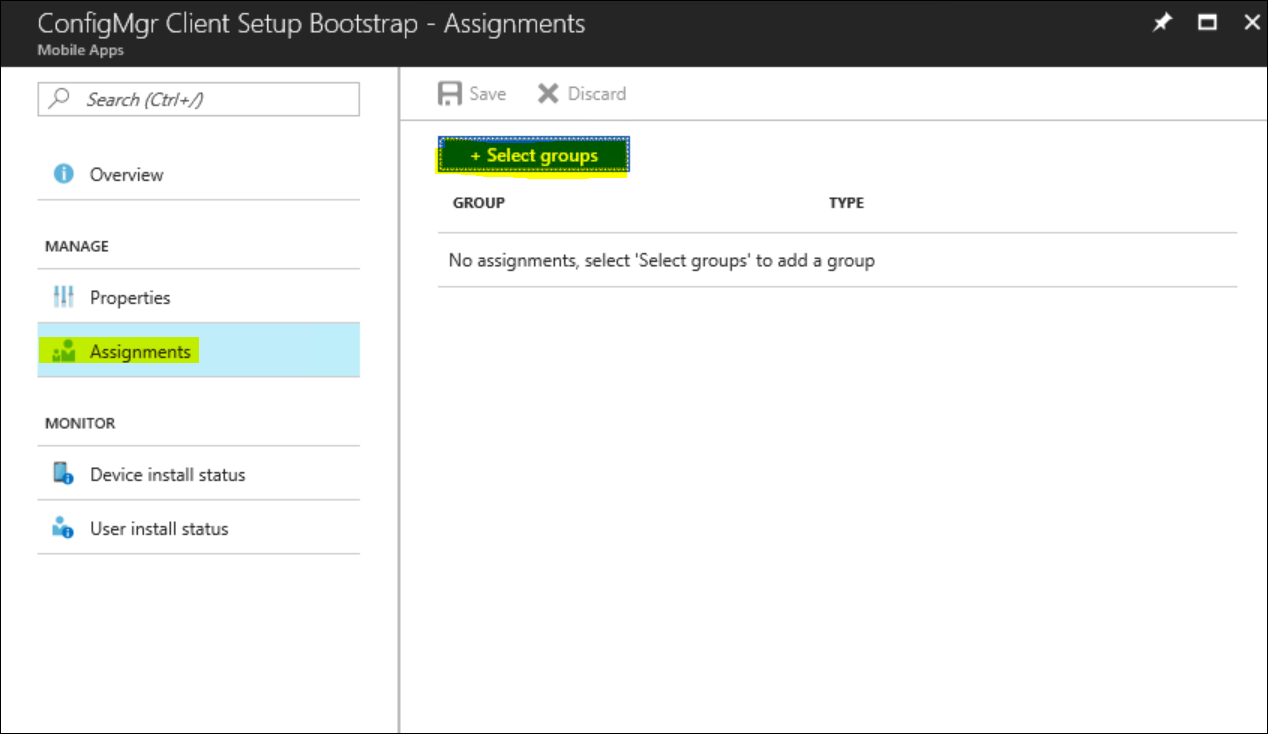
Select a group that holds the users you want to target for Configmgr Client installation and make it a required install.
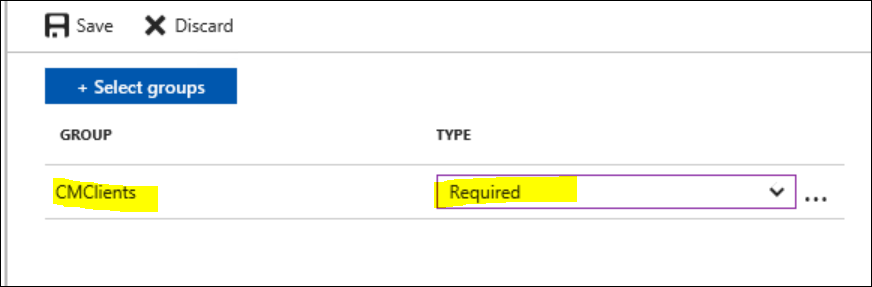
8) Save your “deployment” or assignment as Intune calls them.
Results on the client
9) Back on your Intune-enrolled client, wait for policy sync to happen from Intune, or trigger it manually by going to the “modern” settings page and selecting “Accounts”
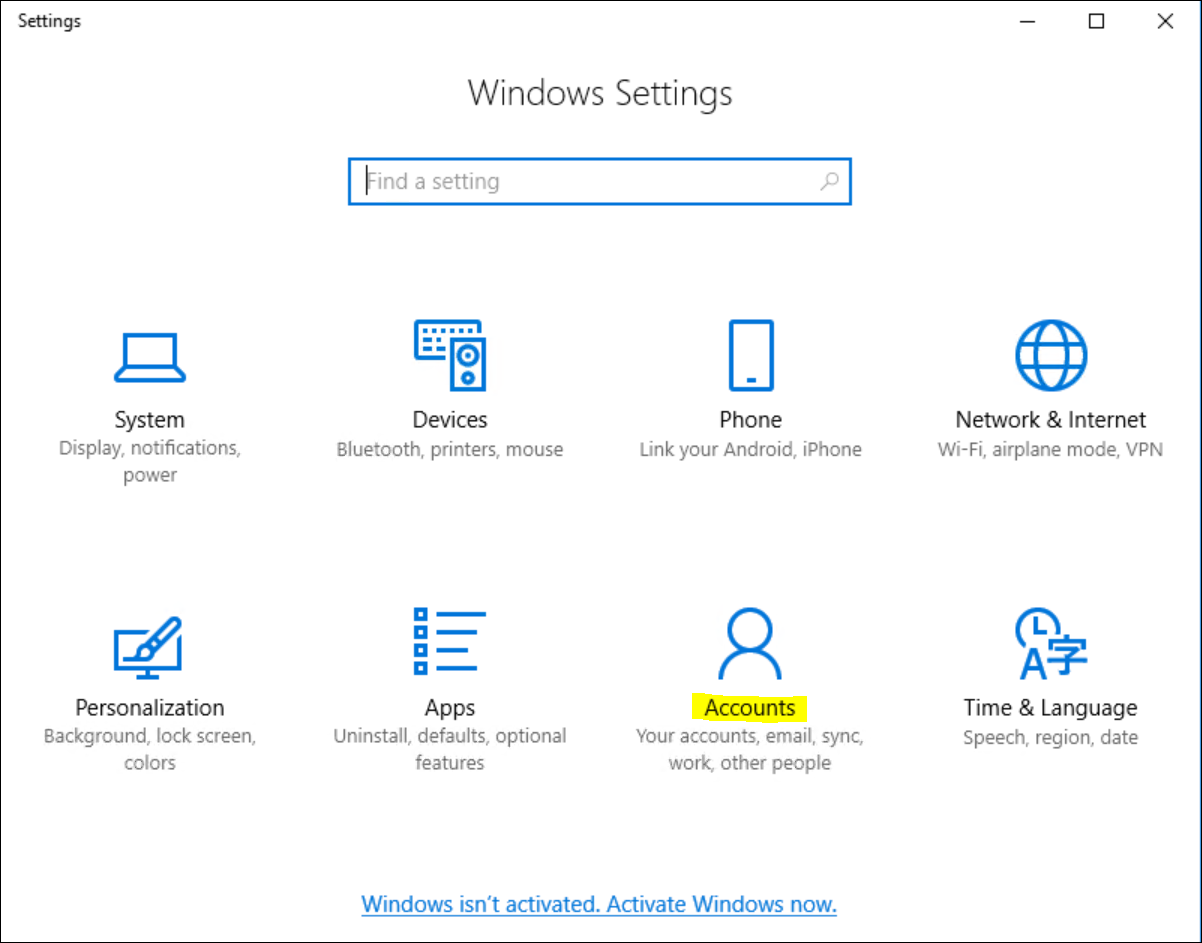
10) Go to Access work or school and select your Intune connection (the one labeled “work or school account”)
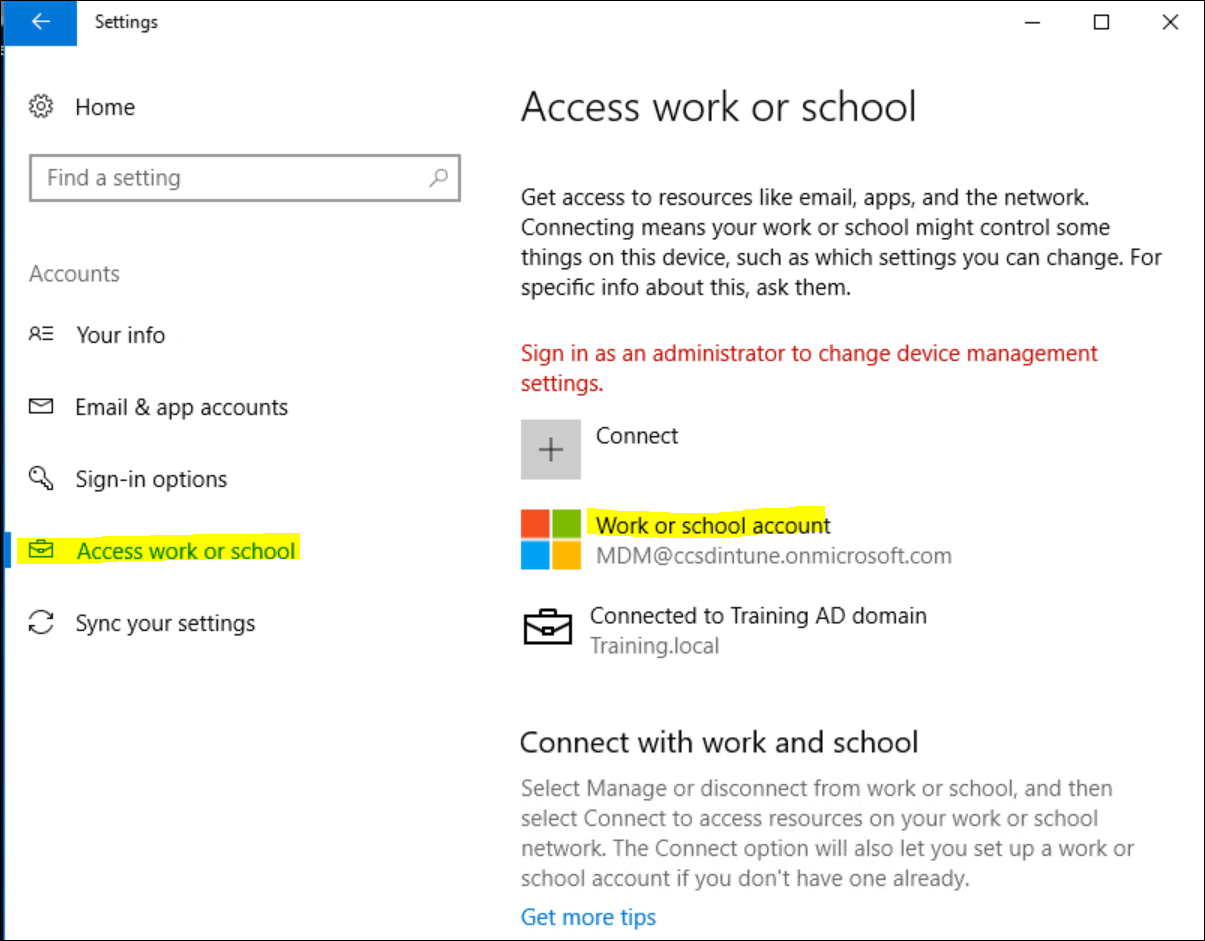
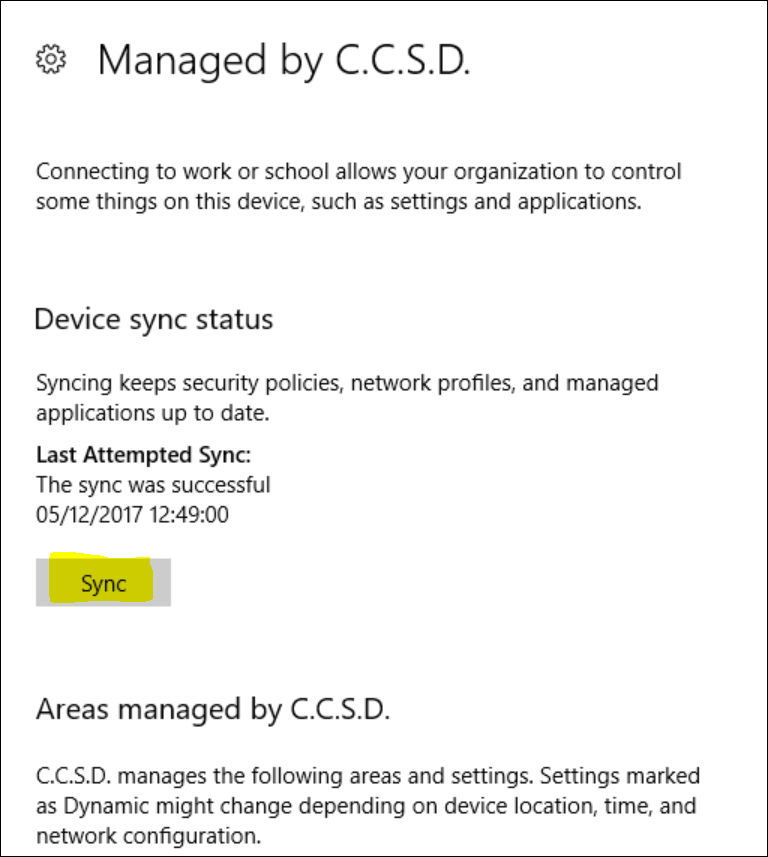
11) Click the “Info” button

12) Here, click on the “Sync” button to force a policy-sync from Intune
The result of those actions should be that the application we created before is getting installed.
Note : As you might have noticed during the creation of our Intune app, we only provided a simple MSI to do the installation. Configmgr needs a lot more files to fully install/configure the agent.
There are a few ways to handle this and one way could be by installing a cloud-distribution point.
However, if you are familiar with deploying the ConfigMgr client, you probably know that the “/MP:…” switch (that is included in our Intune app) means : “Go download the remaining client binaries from that specific management point”.
That’s the way I wanted to get this working here as well.
Good news, it does work that way ! Bad news, it requires you to be patient ;-)
Once the client installation is started by our Intune app, we can go and explore the “CCMSetup.log” (By checking c:\windows\ccmsetup\logs).
As we can see from this log file, it fails to find a distribution point that contains the client binaries.
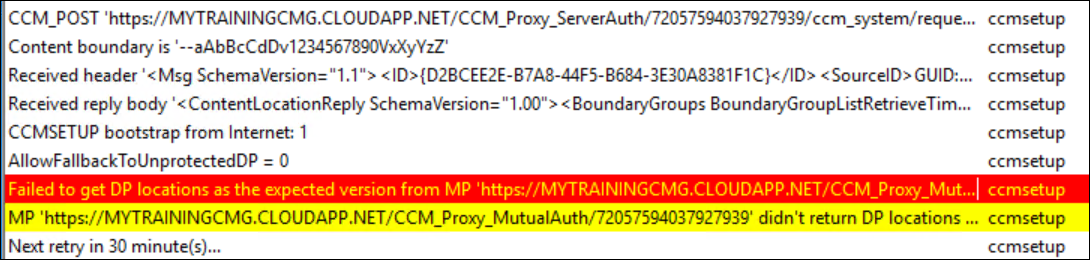
This is where the patience part comes in play. The setup will retry every 30 minutes for a total of 8 times before it will download the content from your management point.
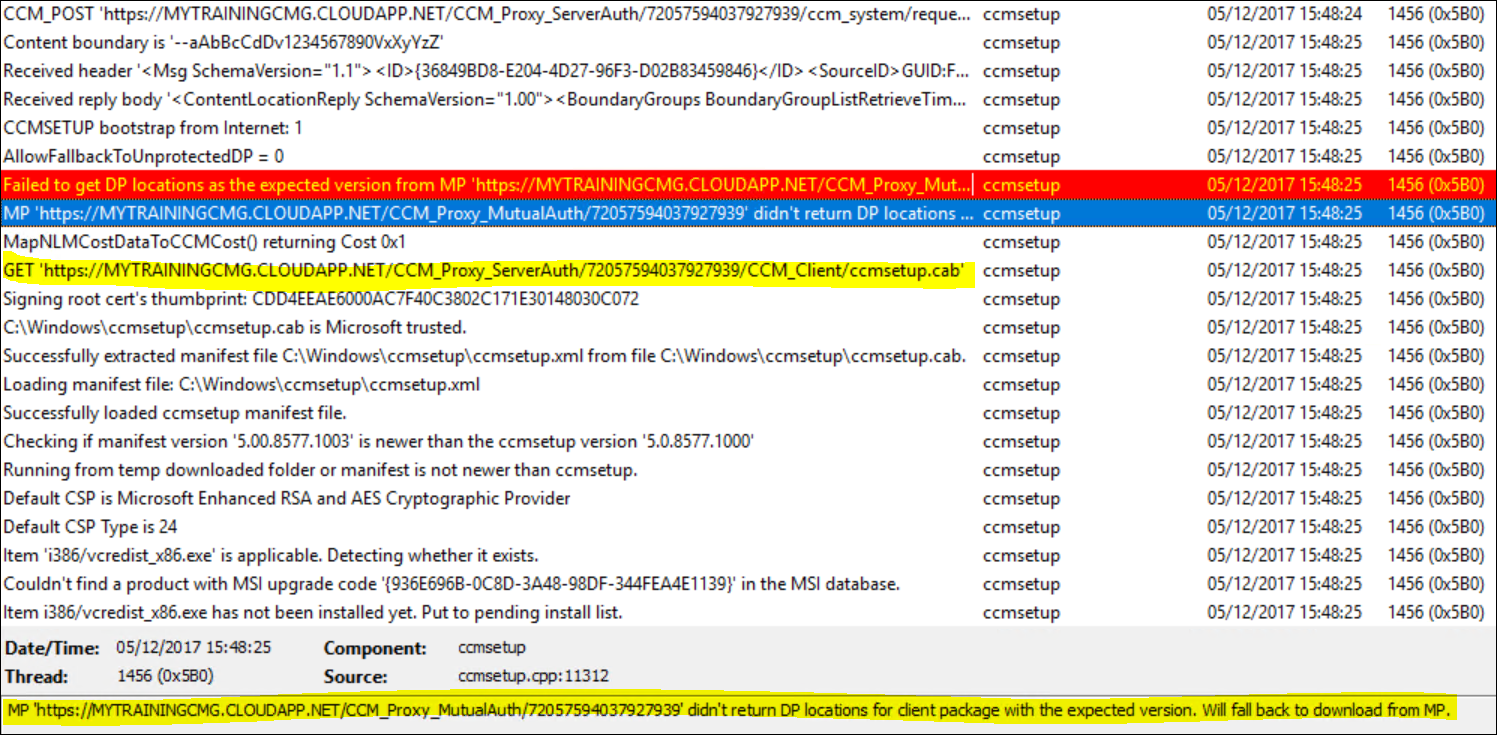
As you can see in the screenshot, we eventually fall back to our MP and download the ccmsetup.Cab.
Once that is done, client installation continues as normal.
Final Notes
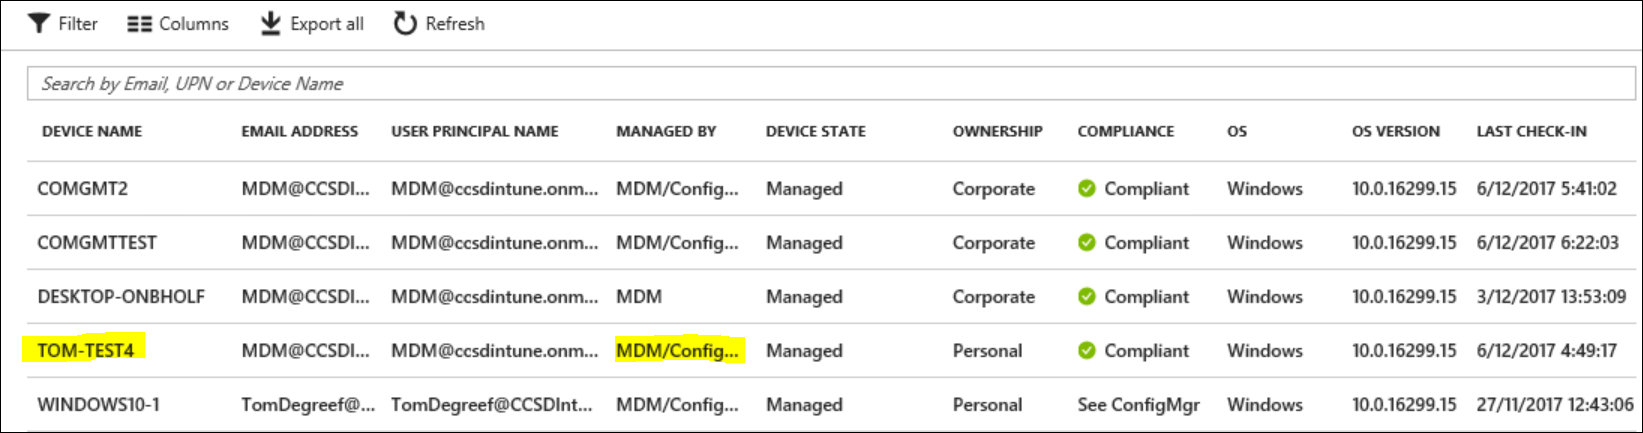
Once your client becomes active and registered with your ConfigMgr primary site, it will depend on how you’ve setup your Co-Management policies whether the device will end up in a Co-Managed state or not. In my scenario, I’m still working with a Pilot collection. My new machine will have to be added to the staging collection for co-management, before it will end up in the Co-managed state.
Ideally, we need a query to identify these type of devices and add them automatically to the proper collection. However, I’ve not been able to create such a query at this point in time. Once I do find a way of getting this done, I’ll update this blogpost with the new information.


Leave a Comment