
Logging in a cloud-world - Part 1
Configmgr provides a wealth of information in logfiles, but they are only useful if you have access to them …
Intro
With the release of MEM2010, we got a feature that I’m super excited about! OSD over the internet (CMG) with bootmedia.. There are already plenty of blogs out there on how to set it up, so this blog is not about that piece of the puzzle.
In an on-premises OSD scenario, I assume most of you perform some sort of error-catching. If the task sequence fails, you copy the relevant logs to a share for further investigation. It’s a tremendous time-saver and super helpful in troubleshooting scenario’s.
However, when you perform OSD over the internet/cmg, there is no share available for you to copy these logs to. To make things even worse, the person doing the OSD is probably in a location that you have no access to, so recovering the logs could become very challenging.
This 2-part blog series is offering you a solution to get the same central logging functionality as you would have on-premises.
Preparations
We are going to use Azure blob-storage as an intermediate storage solution. We will copy the logs to blob storage and retrieve them from there for investigation.
There are multiple ways of storing logs/files in azure, there might be even better ways than how I chose to do it.
This is just one possibility to get you started. By all means choose the solution that you are most comfortable with.
First of all, let’s prepare our blob-container to host the logfiles.
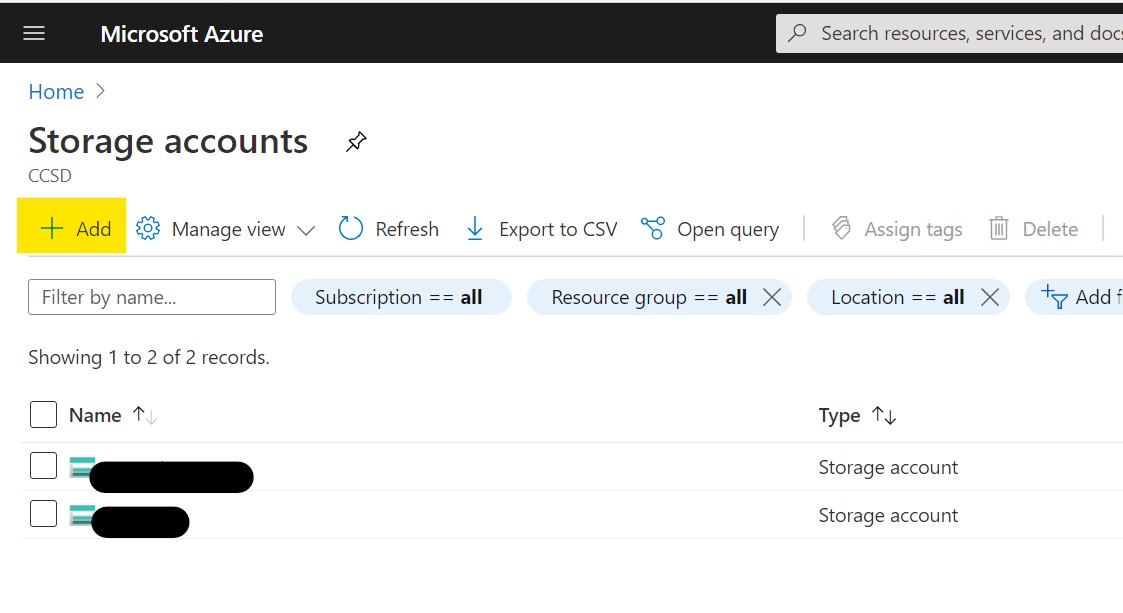
Log-on into the Azure portal with an account that has sufficient access (eg, the one you used to setup your CMG) and navigate to “Storage Accounts”. Depending on the account you used, you’ll probably see a storage container already for your CMG.
Click the “Add” button to create a new storage container.
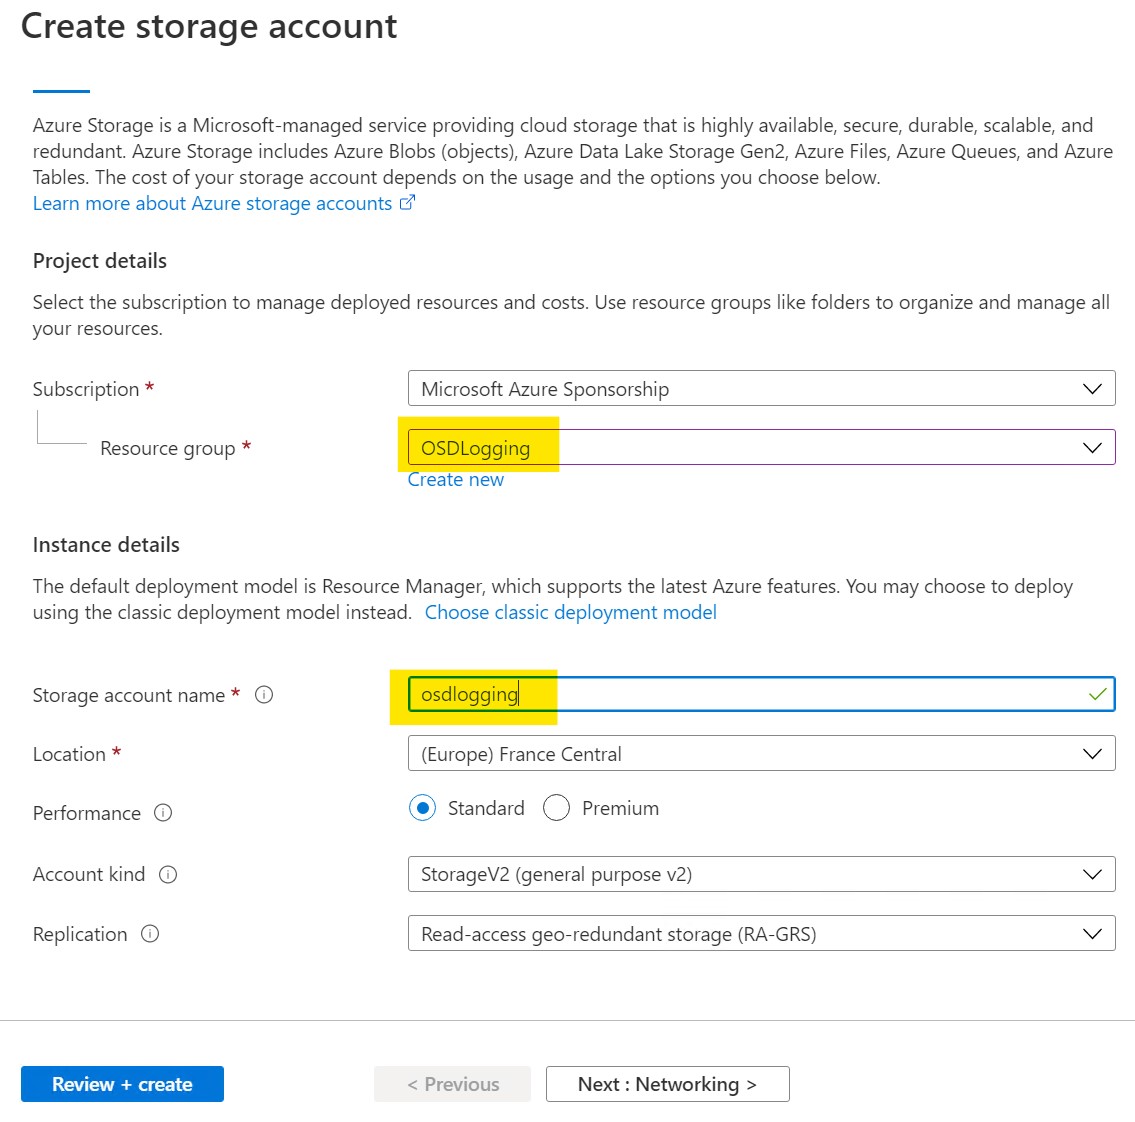
Select, or create a new resource group and choose a name for your container. If needed, you can adjust the options in the other sections, but for our purpose, the defaults are good enough, so just click “Review + Create”.
After reviewing click “Create” to actually create our blob container
If you don’t have it, download and install Microsoft Azure Storage Explorer as it offers an easy GUI to work with our storage containers.
When you first start the tool, a wizard will pop-up asking you to connect to azure storage. Select the first option “add an azure account” and click next.
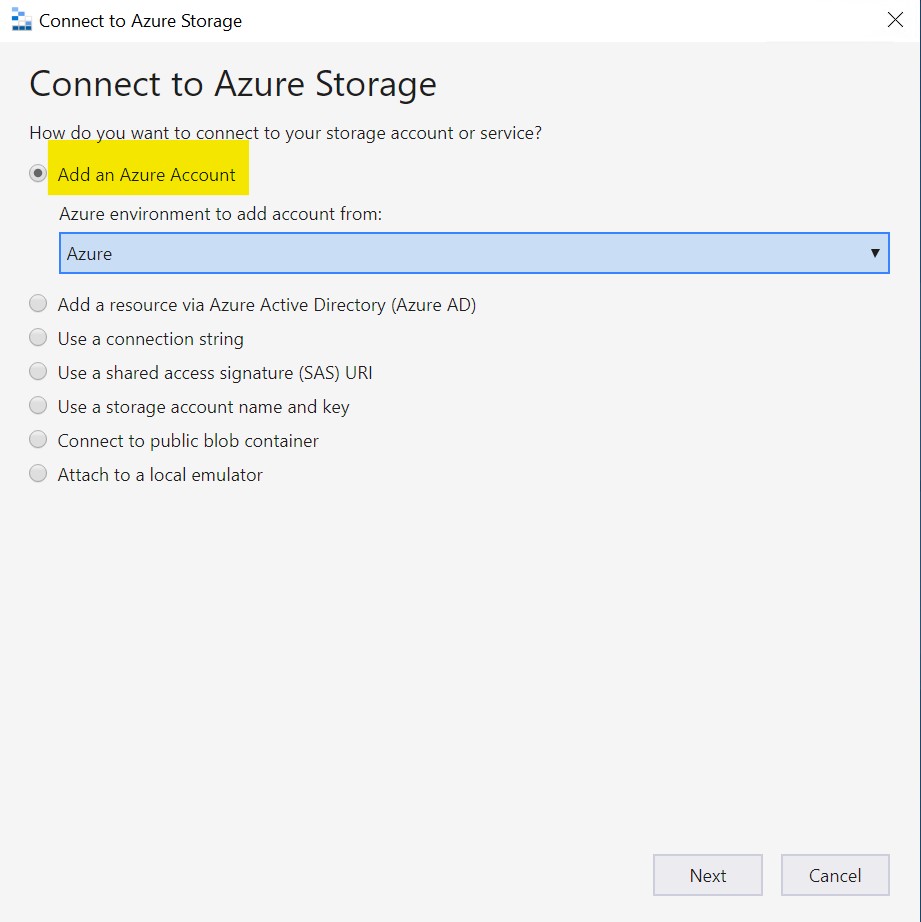
Log in with the account that you used to create the azure blob container.
If all is well, you should be presented with a list of subscriptions that you are entitled to. Expand the subscription you just used to create your container and the container should become visible under “Storage accounts”
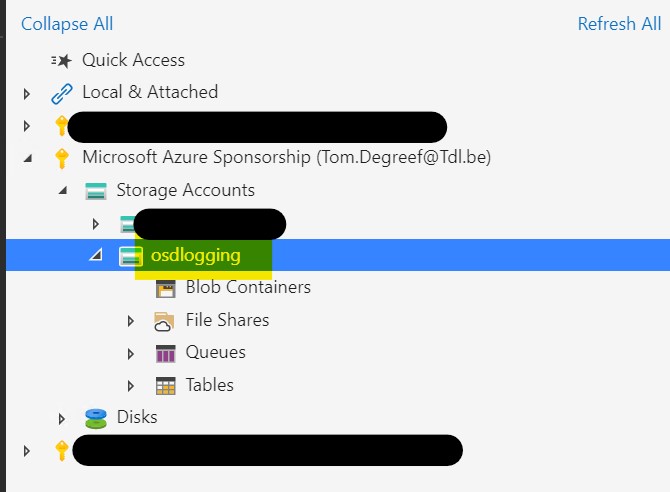
Right-click “Blob Containers” and select “Create Blob Container”
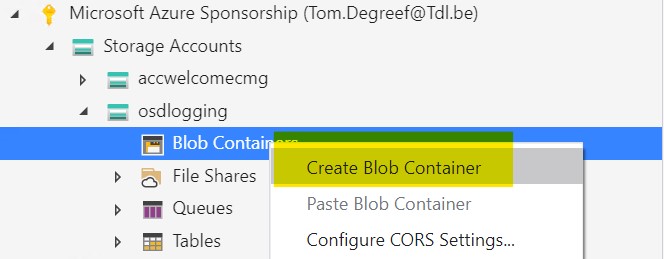
Give it a name to your liking and click OK. In my example, i chose “osdlogs”.
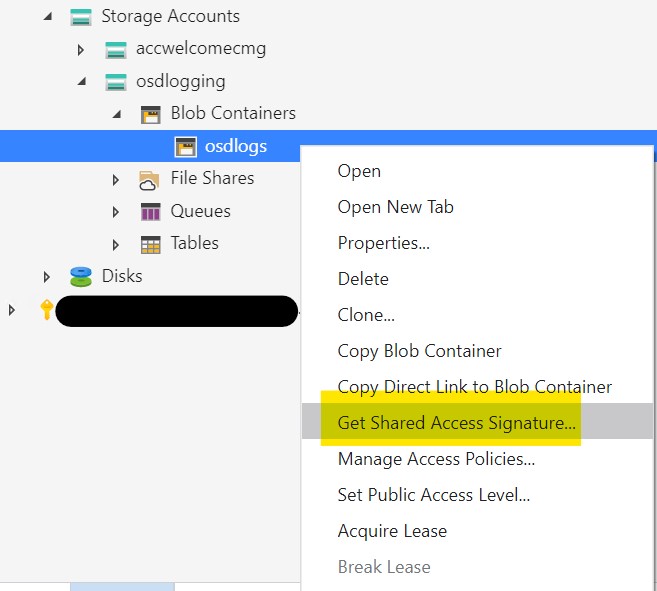
Right-click your newly created container and select “Get Shared access Signature” (I will refer to this as the SAS key in the remainder of this blog)
We are going to create 2 SAS-keys. 1 with “write” access to upload the logs, and 1 with additional delete rights to clean up the container after we retrieved the logs.
For our first key, configure it with these settings :
- Start time : your current date/time
- Expiry time : I set it to 1 year in the future
- Permissions : Read,Add, Create, Write, List (not shown in screenshot)
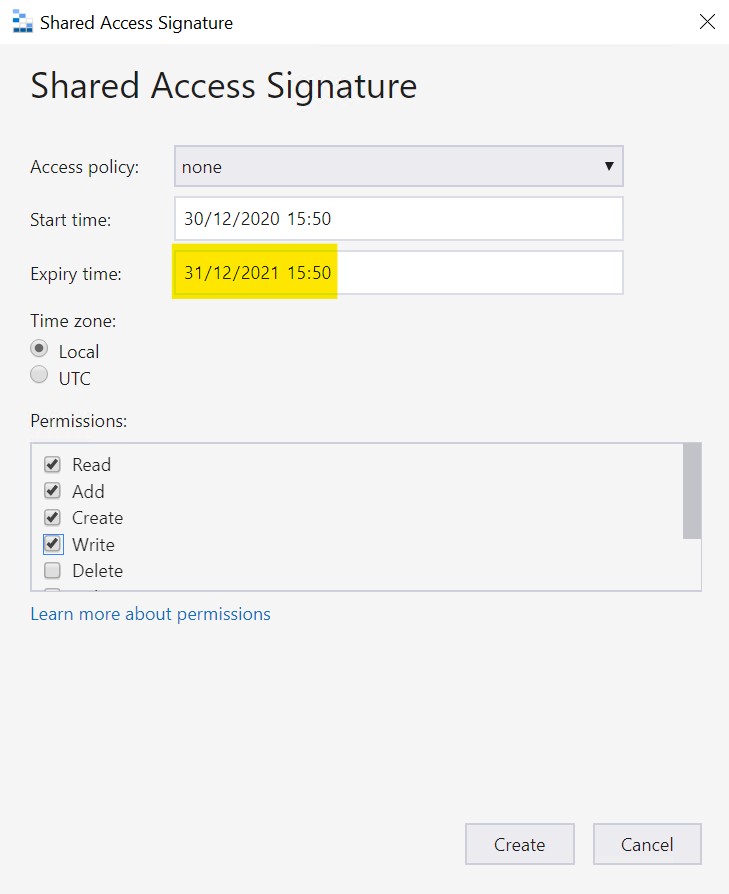
Click “Create” and Copy and save(!!) the Query string. We will need it later.
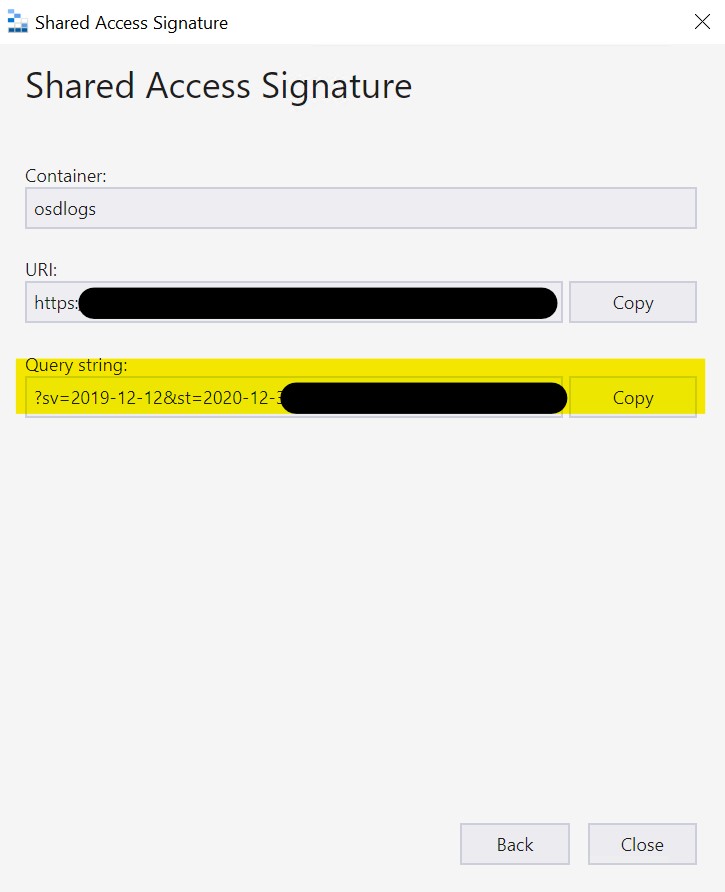
Repeat this process and create another SAS-key, but add the “Delete” permission in this one. Again, copy and save the Query string for later use.
Ok ! All preparations are done, let’s configure our task sequence.
Task Sequence steps
So, the script we will use to upload the logs to Azure makes use of the Azure storage and Azurerm Profile powershell modules. We tried multiple times but we couldn’t get the modules to install dynamically during the task sequence. That’s why we have to install/copy them manually first.
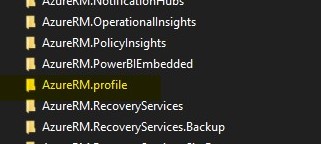
Check your local modules folder to see if you already have this “Azure.Storage” and “AzureRM.Profile” modules installed (C:\Program Files\WindowsPowerShell\Modules)

If not, open an admin powershell window and run the following command to install them :
install-module azure.storage
install-module azureRM.profile
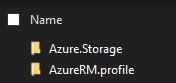
Create an SCCM package with both modules as content (Make sure that you include the folders azure.Storage and azureRM.Profile, not just the content of those folders)
Somewhere after your “Setup windows and Configmgr” step (thus, when you are in the Live-OS part of your task sequence) add a run commandline step with the following command :
Xcopy .\ "%OSDTargetSystemDrive%\Program Files\WindowsPowerShell\Modules" /Y /E
Select the “package” option and link it to the package you just created with the azure storage modules.
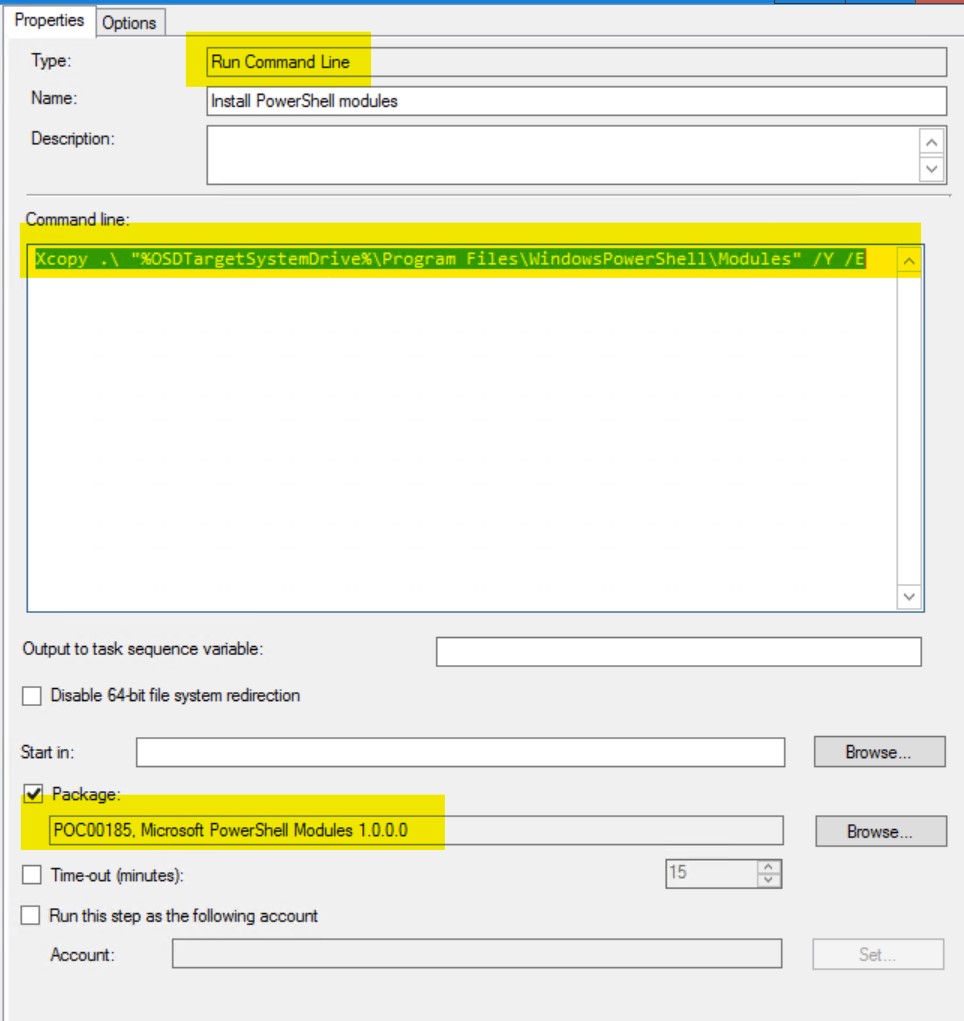
This will copy the modules to the correct location and allow us to reference it in the script.
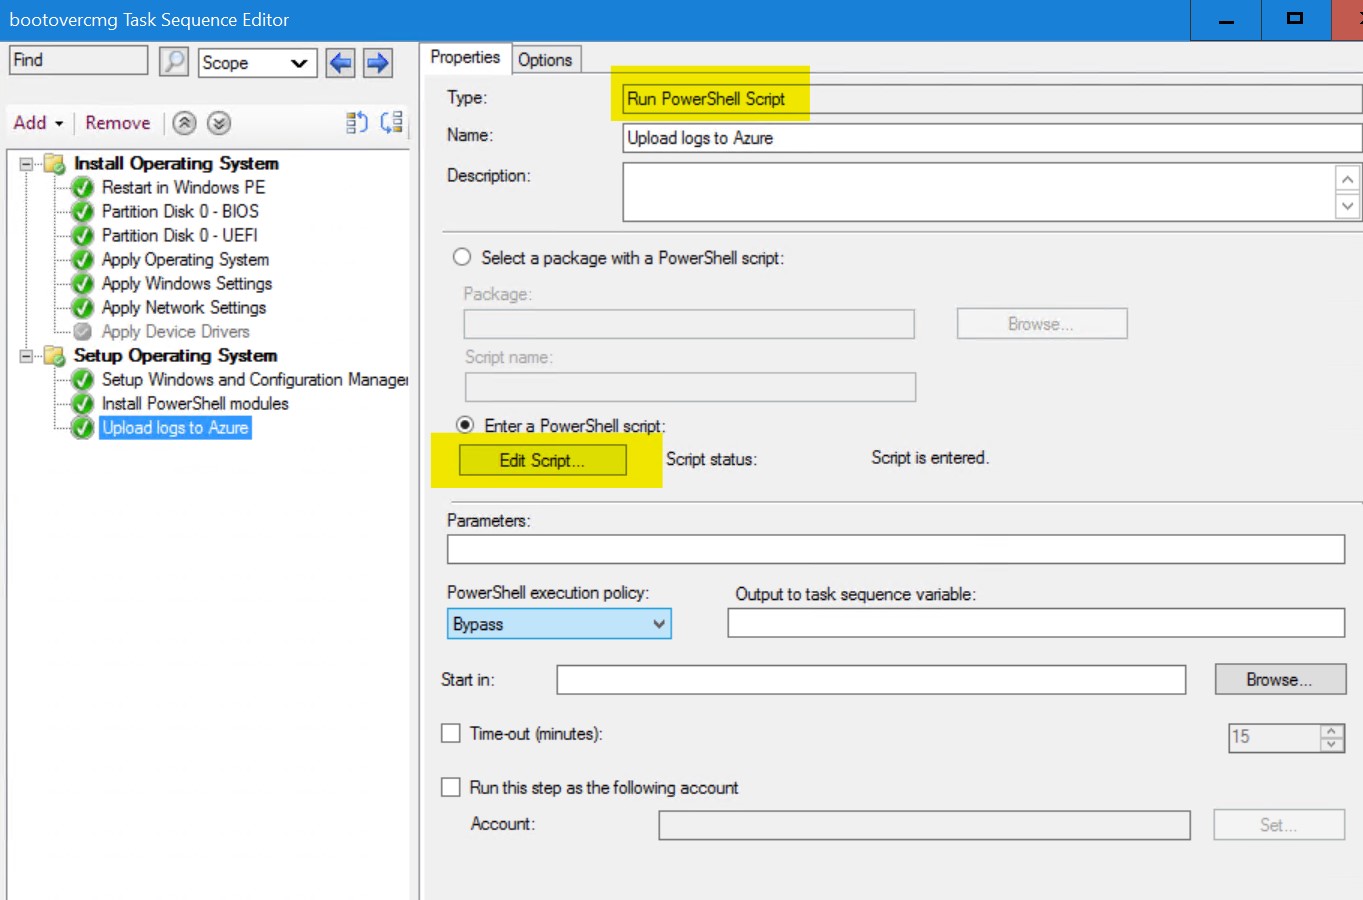
The last step we need to add, is a script that will gather all the logs needed and upload it to azure.
For now, I added it as the last step in task sequence, but you could, just like with normal error-catching, make it conditional to run only when the task sequence fails.
Initially, I do think there is some value in having it run every time, as deploying task sequences over the internet is a rather new thing and the task sequence we normally use might behave differently when there is no domain present.
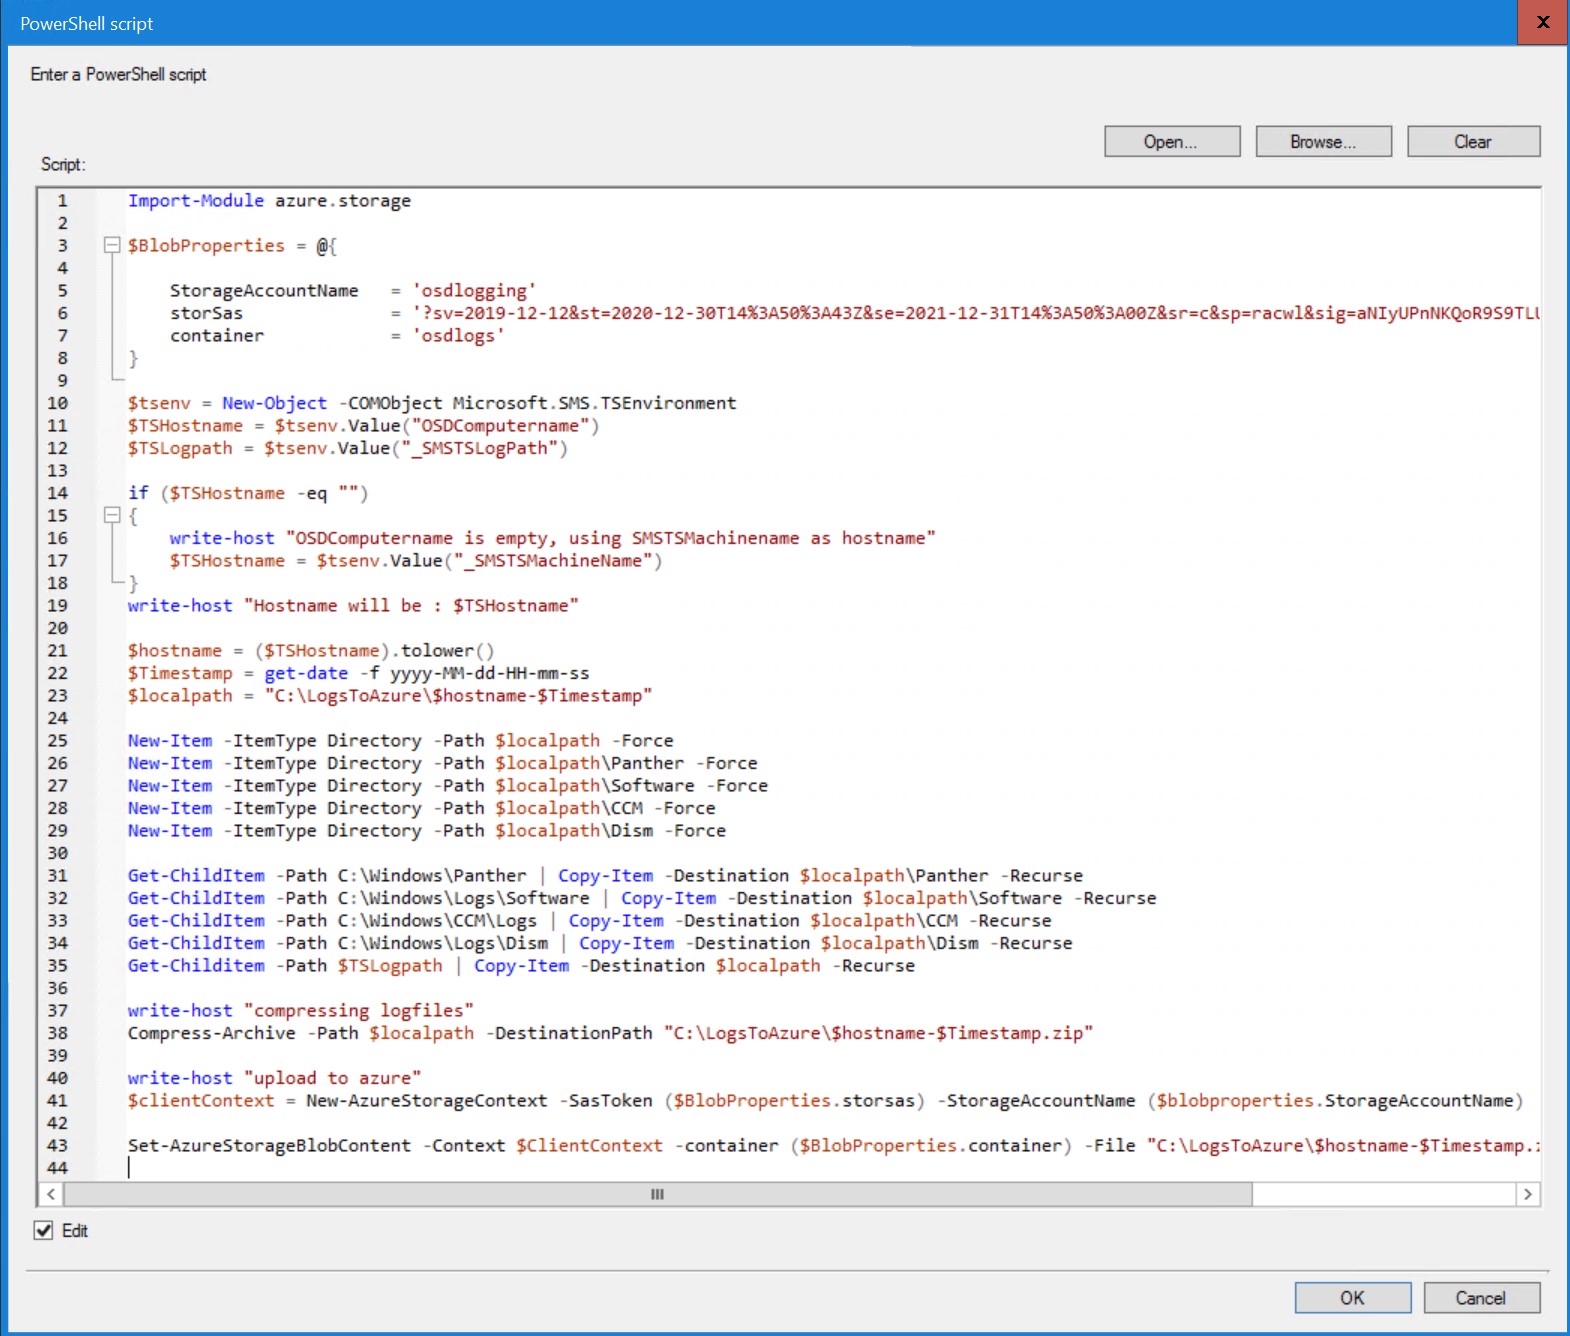
The script :
1
2
3
4
5
6
7
8
9
10
11
12
13
14
15
16
17
18
19
20
21
22
23
24
25
26
27
28
29
30
31
32
33
34
35
36
37
38
39
40
41
42
43
Import-Module azure.storage

$BlobProperties = @{

    StorageAccountName   = 'osdlogging'
    storSas              = '?sv=2019-12-12<<<rest of key is censored>>>'
    container            = 'osdlogs'
}

$tsenv = New-Object -COMObject Microsoft.SMS.TSEnvironment
$TSHostname = $tsenv.Value("OSDComputername")
$TSLogpath = $tsenv.Value("_SMSTSLogPath")

if ($TSHostname -eq "")
{
    write-host "OSDComputername is empty, using SMSTSMachinename as hostname"
    $TSHostname = $tsenv.Value("_SMSTSMachineName")
}
write-host "Hostname will be : $TSHostname"

$hostname = ($TSHostname).tolower()
$Timestamp = get-date -f yyyy-MM-dd-HH-mm-ss
$localpath = "C:\LogsToAzure\$hostname-$Timestamp"

New-Item -ItemType Directory -Path $localpath -Force
New-Item -ItemType Directory -Path $localpath\Panther -Force
New-Item -ItemType Directory -Path $localpath\Software -Force
New-Item -ItemType Directory -Path $localpath\CCM -Force
New-Item -ItemType Directory -Path $localpath\Dism -Force

Get-ChildItem -Path C:\Windows\Panther | Copy-Item -Destination $localpath\Panther -Recurse
Get-ChildItem -Path C:\Windows\Logs\Software | Copy-Item -Destination $localpath\Software -Recurse
Get-ChildItem -Path C:\Windows\CCM\Logs | Copy-Item -Destination $localpath\CCM -Recurse
Get-ChildItem -Path C:\Windows\Logs\Dism | Copy-Item -Destination $localpath\Dism -Recurse
Get-Childitem -Path $TSLogpath | Copy-Item -Destination $localpath -Recurse

write-host "compressing logfiles"
Compress-Archive -Path $localpath -DestinationPath "C:\LogsToAzure\$hostname-$Timestamp.zip"

write-host "upload to azure"
$clientContext = New-AzureStorageContext -SasToken ($BlobProperties.storsas) -StorageAccountName ($blobproperties.StorageAccountName)

Set-AzureStorageBlobContent -Context $ClientContext -container ($BlobProperties.container) -File "C:\LogsToAzure\$hostname-$Timestamp.zip"
You could pretty much use the above script as-is. You just have to adjust the variables for the azure storage.
1) On line 5, set the StorageAccountName to the StorageAccountName we created in the azure portal
2) On line 6, replace the content of the storSAS variable with your “Write” SAS-key
3) On line 7, provide the name of the blob-container we created in our preparation step using the storage explorer tool.
I used a “Run powershell script” step and added the script in-line in the task sequence.
! Make sure to set the appropriate powershell execution policy for your environment in this step !
note : We copy the files/folders that are, in our opinion, most relevant in OSD troubleshooting :
- Dism : this will help you with errors injecting anything dism related (language packs, drivers, …)
- Panther : for troubleshooting unattend.xml or domain-join related issues
- Software : we are heavy advocates of using the powershell app deployment toolkit for application installs, by default the PSADT logs to this folder and copying this folder helps in troubleshooting application related install issues during OSD
Ok, we’re all setup for testing ! Run your task sequence and if all goes well, once it finished, you should see a zipfile with the hostname of the device you staged and a timestamp in your azure storage explorer

We could now use storage explorer to download it, but why not automate this step as well …
Retrieving the logs
The following script will download your logfiles from azure, unpack them and clean up the storage container
1
2
3
4
5
6
7
8
9
10
11
12
13
14
15
16
17
18
19
20
21
22
23
24
25
26
27
28
29
30
31
32
Import-Module azure.storage

$BlobProperties = @{

    StorageAccountName   = 'osdlogging'
    storSas              = '?sv=2019-12-12<<<rest of key is censored>>>'
    container            = 'osdlogs'
}

if (!(test-path "C:\LogsFromAzure"))
{
    New-Item -ItemType Directory -Path "C:\LogsFromAzure"
}

$clientContext = New-AzureStorageContext -SasToken ($BlobProperties.storsas) -StorageAccountName ($blobproperties.StorageAccountName)

$files = Get-AzureStorageBlob -Container ($BlobProperties.container) -Context $clientContext

foreach ($file in $files)
{
    write-host $file.name
    Get-AzureStorageBlobContent -Destination "C:\LogsFromAzure" -Container ($BlobProperties.container) -Context $clientContext -Blob $file.name

    write-host "expanding logfiles"
    Expand-Archive -Path "C:\LogsFromAzure\$($file.name)" -DestinationPath "C:\LogsFromAzure"

    write-host "cleaning up"
    Remove-Item -Path "C:\LogsFromAzure\$($file.name)" -Force

    Remove-AzureStorageBlob -Container ($BlobProperties.container) -Context $clientContext -Blob $file.name

}
Same story as with the previous script, make the following adjustments :
1) On line 5, set the StorageAccountName to the containername we created in the azure portal
2) On line 6, replace the content of the storSAS variable with your “DELETE” SAS-key (the 2nd SAS key we created)
3) On line 7, provide the name of the blob-container we created in our preparation step using the storage explorer tool.
If you then run this script, it should download the logs from Azure, expand the archive, delete the zipfile and clean up your Azure blob container.
As a final step, you could run this script on a schedule so that any log files get downloaded automatically so that they are ready when you need them!
Final thoughts
We’ve got all the bases covered to have the same functionality as you would have when performing OSD on-prem.
The scripts provided should get you started into implementing this into your own environment without too much hassle!
So, what’s left for part 2 ? We will look into encrypting the data before putting it up on a “public” storage location.
Hope you enjoyed part 1 and if you encounter any issues, or if something is not clear, let us know in the comments below.
Have fun !
Tom


Leave a Comment